Autoupdater > AutoUpdater (All Contents)
AutoUpdater
AutoUpdater is a utility can be implemented for any Omnis Studio application. AutoUpdater can be used by developers to simplify and automate the process of updating runtime clients with newer release files of any Omnis Studio application which the developer creates.
AutoUpdater is a single Omnis Studio library. The AutoUpdater library is unlocked. All of the AutoUpdater code is good old Omnis Studio code which developers can read, step through, and if necessary debug.
AutoUpdater supports serving newer release files on:
- FTP - any FTP server accessible by the runtime clients.
- DB - any database accessible by the runtime clients.
- LAN - any mountable drive accessible by the runtime clients on a local area network. (This is the least recommended approach)
Runtime clients can specifiy:
- Release type of Final or Beta and switch back and forth at any time.
- Update frequency of Manual or On Launch.
- Prompt before Installing Updates or automatically download and install newer releases.
Developers can specify:
- Expiry Date - after which period the runtime client must obtain an new AutoUpdater library from the developer in order to be able to download new updates.
- Server Type (FTP, DB, LAN), and the address, user name and password. The user name and password are not accessible by the runtime clients.
- Package(s) to be included with the application. Each package specifies the files included in the package.
Developers upload files to their AutoUpdater files server and prepare an AutoUpdater library for their specific application and client. The AutoUpdater library is shipped to the runtime client. When the AutoUpdater library is opened it immediately downloads and installs the packages and files included with the application and then opens the application.
Newer release files are uploaded to the files server by the developer. The runtime client AutoUpdater library checks the file server for new updates and if found, downloads and installs the newer version files on the client's computer.About this Manual
This manual begins with a which will take you through the basics of setting up to work with your Omnis Studio application.
The more detailed documentation is after the . You should scan through the after you complete the to get a deeper understanding of AutoUpdater and to learn about the advanced features of AutoUpdater.Quickstart Tutorial
For those of you who don't like reading documentation, this will get you up and running quickly with your own library.Preparing your AutoUpdater Library
- Create a new folder and name it whatever you call your Omnis Studio application. The folder name can be any name. For this tutorial we will refer to the folder as the APP folder.
- Put a copy of the AutoUpdater.lbs library inside your APP folder.
- Rename the AutoUpdater.lbs library to something appropriate for you application. e.g. MyAppName_AutoUpdater.lbs (MyAppName would be replaced with the short name for your application.)
- Make a subfolder inside the APP folder, name it libraries.
- Drag your application's library(s) and folders into the libraries subfolder.

Note: If your application has large size files and many of them, just create and drag in a small test library for this quick start tutorial.
- Open the MyAppName_AutoUpdater.lbs library with a developer version of Omnis Studio.
- You will be asked if you want to open the main library. Click the button.
- The menu will be installed. Select the menu line. This opens the window.
- The window will open to the > tab.
- Enter the full name of your application in the field.
- Enter the short name of your application in the field. If you want to have client specific packages append the short name with a client ID. e.g. MyAppName_Jones
- Select the > tab. For testing purposes you can leave the current settings which will use the studiotips.net FTP server. Later on you will want to set the files server to your own FTP server or a database on your local network.
- Select the > tab. Take a look at the settings. You can change them if you like.
- Select the tab.
- Click the button. All of the files inside your APP folder should be listed, except the MyAppName_AutoUpdater.lbs library.
- Click the button. This should upload your package description file and your files to the studiotips.net server.
- your developer version of Omnis Studio.
Testing Your AutoUpdater Library
- Create a new empty folder on your Desktop. Name it AutoUpdater_Test1
- Put a copy of your MyAppName_AutoUpdater library into the AutoUpdater_Test1 folder.
- Using a runtime version of Omnis Studio open the MyAppName_AutoUpdater library inside the AutoUpdaterTest1 folder.
- All going well the library will prompt you with a window informing you that an update can be downloaded.
- Click the button to proceed.
- All going well will download the package and files from the server, create the subfolder(s) inside the AutoUpdater_Test1 folder, install the downloaded files, and then open the library(s) directly inside the libraries folder.
There you have it, !
You are now ready to test uploading newer version files.Uploading Newer Version Files
In this section of the tutorial we will use to upload a newer version library to the files server with a developer version of Omnis Studio, then open the AutoUpdater_Test1 with a runtime version of Omnis Studio to watch how it downloads the newer version of the library to the runtime user.
- Using a developer version of Omnis Studio reopen the MyAppName_AutoUpdater library which which you prepared in the first section of this tutorial. (Not the one inside the AutoUpater_Test1 folder.)
- When it asks if you want to open the main library, click the button.
- Go into the mMainWindow of your application's main library and add a comment line in text field on the window or make some other change that you will be able to see. (Drag and drop a button on the window)
- Right-click on the main library in the and select to make sure that the change is saved to the disk.
- Open the window from the menu.
- Click the tab.
- Click the button. You will be prompted to select a file. Navigate to and select the main library which you just modified. (You can also drag and drop files onto the files list.)
- In the line of the tab window increment the release hour droplist to the next hour.

The release hour droplist defaults to the current hour. If you do more than one release of the same library in the same hour, you need to manually increment it to the next hour.
- Click the button. All going well your newer file will be uploaded to the server and you will see it appear in the list, replacing the older version in the list.
Windows users may need to first close the library files which they wish to upload before cliciking the button.
- Click the radio button below the list. You will see all of the files which have been uploaded for the selected package.
You are now ready to test updating the runtime library.
You can leave your developer version of Omnis Studio open.Updating the Runtime App
- Using a runtime version of Omnis Studio open the MyAppName_AutoUpdater library inside the AutoUpdater_Test1 folder.
- All going well the library will prompt you with a window informing you that an update can be downloaded. The file which you uploaded to the files server should be list.
- Click the button to proceed.
- All going well will download the newer version library from the server, install the downloaded file, and then open the library(s) directly inside the libraries folder.
That's it for the .
You now have the basics for using . Scan through the documentation to learn more features and ways to customize to suit your requirements.Adding AutoUpdater to Your App
This section covers adding AutoUpdater to your existing Omnis Studio application.File Structure
The strategy behind AutoUpdater is that the user opens the AutoUpdater library rather than opening you application's library(s).
This give the AutoUpdater library a chance to:
- Check to make sure all the files which are supposed to be include in the application are present and download and install any missing files.
- Check for any newer version files on the files server and download and replace any older version files.
AutoUpdater then opens your application's main library. Your application's main library is responsible for opening any additional libraries if your have a multi-library app.
In order to make it simple for the user, it is recommended that you do the following to set up your application for use with AutoUpdater.
- Create a new empty folder. Name it an appropriate name, such as your application's short name. e.g. MyAmazingApp In this AutoUpdater documentation we refer to this folder as the APP folder.
- Put a copy of the AutoUpdater library inside the APP folder. Rename to an appropriate name that makes sense to your users. e.g. open_MyAmazingApp or MyAmazingApp_AutoUpdater. This is the file your users will double-click to open your application on their computer.
- Create a subfolder inside the APP folder. Name it libraries.
- Drag your application's files and folders inside the libraries folder. Your application's main library (the one users used to double-click to open your application) must be located directly inside the libraries subfolder.
Some developers have indicated that they want to copy the AutoUpdater library classes into their own main library, negating the need for a separate AutoUpdater library. Theoretically this is possible to do, however, I have not attempted to do this with any of my own applications. It does mean that whenever your main library is updated you will have to do a self-update... a tricky operation because it involves an open library to replace itself.
Copy Classes
There are a few AutoUpdater classes which you need to copy to your application's main library.
- Open the AutoUpdater library located in your APP folder using your developer version of Omnis Studio.
Never open the AutoUpdater library in your development APP folder with a runtime version of OMST! Doing so could cause your development libraries to be overwritten with the last version of the libraries on the files server. Not a good thing!
AutoUpdater will not download files from the files server if you are using a developer version of Omnis Studio. - When AutoUpdater asks if you want to open the main library, click the button. All going well your application will be opened.
- Press F2 to open the .
- Expand the AutoUpdater library node under the Libraries not of the F2 Browser. (The AutoUpdater library will be whatever file name you gave it.)
- Select the Copy to Main Library folder.
- Drag the mAutoUpdater and the oAutoUpdater classes to your application's main library.
Menu Lines
You will now add a menu line to one of your application's menus to give your runtime users access to sending messages to your application's AutoUpdater library.
- Add a menu line to your application's main menu or your application's help menu.
- Select the added menu line and set the following properties for the new menu line:
- $cascading - select the mAutoUpdater class
- $name - enter AutoUpdater
- $text - enter Updates... or whatever is appropriate to your local language.
- Remove and reinstall the menu.
- Select the line in the cascading menu. All going well the runtime window will be opened.

You can change the menu line $text properties of the mAutoUpdater menu to suit your local language.
Preferences
The next step is to set up the AutoUpdater for your application.
- From the AutoUpdater menu, select the menu line for your application. It might still be called
- The > tab will already be selected.
- Enter the full name of your application in the field. As you enter the application name the window title and AutoUpdater menu line will be updated.
- Enter the short name of your application in the field. If you have different version of your application for different clients append a client's ID to the package name.
Files Server - Database Settings
The next step is to set up the files server for your application.
If all of your users are operating on a local network with a common database it is recommended that you use a database as a files server.
To set up a database as a files server:
- Create a database named autoupdater using your database's administration tool.
- If required by your database create a user who has authority to create tables in the autoupdater database.
- Select the > tab
- - select Database
- - select the appropriate DAM for your database. (If your database is not listed, see the section in the documentation for adding DAMs to AUP)
- Enter the remaining fields as appropriate for the database you have created.
- Click the button. All going well, AutoUpdater will logon to your autoupdater database and immediately create the tables it needs.
Files Server - FTP Settings
To set up an FTP server as a files server:
- Create an autoupdater folder on your FTP site.
- Create an ftp_autoupdater user on your FTP site with a password. The ftp_autoupdater user should log directly into the autoupdater directory and not have rights to go any higher in your directory structure.
- Under the > tab
- - select FTP Server
- Enter the remaining fields as appropriate for the FTP files server you have prepared.
- Click the button to make sure AutoUpdater can ping your FTP files server. (Provided it will respond to TCPPing)
- Click the button to FTPConnect to the FTP server.
Create Package
Create and upload your first package in the same manner as you did in the .
- Select the tab.
- Click the button.
- Click the button.
- All going well your package and files will be uploaded to (inserted into) your autoupdater database.
Distributing your Application
Distributing your AutoUpdater savvy application to runtime users who have Omnis Studio installed on their computer is easy.
- Copy your AutoUpdater library to an empty appropriately named folder. e.g. MyAmazingApp
- Copy the folder with the enclosed AutoUpdater library to the runtime computer.
- Open the AutoUpdater library using a runtime version of Omnis Studio.
- AutoUpdater will connect to the specified files server and download and install all the files specified by the package.
- Each subsequent time the runtime user opens their AutoUpdater library, newer version files will be downloaded and installed prior to opening the application.
Summary
That covers the basics for adding AutoUpdater to your application, setting up your own files server, and distributing your AutoUpdater savvy application.
For a more in depth understanding of AutoUpdater and additional features read the section.Technical Documentation
This section of the AutoUpdater manual provides technical information on how AutoUpdater works and additional features.
The AutoUpdater library is unlocked, so you can look at the actual classes and code, and even step through the code to fully understand how things work.Glossary
The following is a list of terms used in the AutoUpdater documentation.
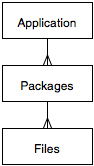
- Application - The complete set of files which make up an Omnis Studio application. The files can be libraries, data files, text files, images files, etc. An application is made up of one or more packages.
- Package - A text file that describes the list of files included in the package. The description includes whether the file is included or to be deleted and the relative file path on the computer. The relative path starts from the APP, OMNISSTARTUP, OMNIS, or USERPREFS folder.
- APP folder - The parent folder of the AutoUpdater library.
- OMNIS folder - The parent folder of the Omnis Studio executable.
- OMNISSTARTUP folder - A folder located in the directory tree structure at a level above the Omnis Studio executable parent folder. The file is typically located in the Applications folder on MacOSX, in the Program Files folder on WinXP, or \UserName\AppData\Local\ folder on WinVista.
- USERPREFS folder - A folder located in the platform specific directory normally for user preferences files.
- Files Server - The FTP server, Database, or Local Area Network drive, where the files and packages are uploaded by the developer and can then be downloaded by a runtime client AutoUpdater library.
- AutoUpdater library - The library which contains all of the AutoUpdater code. The developer renames the AutoUpdater library and sets the AutoUpdater preferences for their own application. The AutoUpdater library is used by the developer to create and upload files. A locked copy of the developer's AutoUpdater library is then released to the runtime clients. When opened with a runtime version of Omnis Studio the AutoUpdater library is only able to check for and download files.
- targetfilename - The actual name of the file after it is copied from the server to the location specified by the targetfilepath.
- targetfilepath - The location on the user's computer where the downloaded file is to be copied to. The targetfilepath is always relative to the APP or OMNIS folder.
- serverfilename - The name of the file on the server. The server file name appends the release date/time/beta to the target file name. The release information is appended to the targetfilename in the format ___YYYYMMDD_HHb. The b is added for beta releases.
Packages
A package describes the files which are included in the package. The file description includes the relative target path from the APP, OMNIS, OMNISSTARTUP, or USERPREFS folder.
Optionally, a package can describe obsolete files which are to be deleted on the client if found.
A package has a release date, release hour, and release type. You only need to issue a new beta or final release package if you add or remove files from an existing package. If the files included in a package do not change, there is no need to issue a new package!
The first time an AutoUpdater library is opened by a runtime client the package fie is downloaded from the files server to the client computer. (See for details.)
AutoUpdater then goes through the list of target files specified by the package to make sure they exist. Any missing files are downloaded from the files to the client computer. Folders and subfolders are created by AutoUpdater as needed.
You just need to provide your client the AutoUpdater library inside an APP folder. AutoUpdater will do the rest for you.
Each subsequent time the runtime client open the AutoUpdater library, AutoUpdater compares the version of the package on the local runtime client with the latest version of the package on the files server. If a newer version package exists on the server AutoUpdater downloads it to the client and then compares the list of files included or excluded with the package. AutoUpdater deletes any files which are set to excluded, then checks for all the files listed and downloads and installs any missing files.
Use the tab to modify an existing package and then upload ito the files server.An application can include more than one package, though doing increases the complexity of keeping your clients properly synchronized. If you want an application to have more multiple packages list them as a comma separated string in the Package Name field in the .
Files
A package includes one or more files and describes where the files are to be located on the runtime client's computer.
Each file in a package must have a unique name.
When a file is uploaded to the files server by the developer using AutoUpdater the release date, hour and release type are included with the file.
AutoUpdater checks the current version of each file on the runtime client against the lastest version on the files server. If there is a new version on the files server AutoUpdater downloads the file replacing the old file with the newer version.Beta Versions
You can upload beta version files and even beta version packages.
If the runtime client sets their AutoUpdater version preference to Beta, AutoUpdater will check download and install a beta version file only if the release date and hour of the beta version file is greater than the non-beta version of the file installed on the runtime client computer.
If the runtime clients sets their AutoUpdater version preference back to Final, AutoUpdater will replace and beta version files with the latest final version file, thereby allowing the client to revert to the latest final version of your application.Expiry Date
In the developer preferences window you can set an Expiry Date. AutoUpdater will check for an expiry date and if one has been set, will be compare it the current date. If the current date is greater than the expiry date AutoUpdater will not check for, download, or install updates. The runtime user will receive an error message informing them that the AutoUpdater library has expired and it is unable to check for newer releases.Local Files
AutoUpdater creates the following folders and files in the USERPREFS folder.
- USERPREFS/autoupdater The root folder for the AutoUpdater files.
- USERPREFS/autoupdater/PackageName/ PackageName is replaced with the actual package name. One PackageName folder is created for each package.
- USERPREFS/autoupdater/PackageName/installedfiles.txt A text file which keeps the history of all the files downloaded and installed for the package. The date and time of each downloaded and installed file is recorded in the installedfiles.txt file.
- USERPREFS/autoupdater/PackageName/PackageName__YYYYMMDD.txt PackageName is replaced with the actual package name. Each package file contains a list of all the files to be included in the package. The package file is a text file. When a newer package file is installed, the older package file is deleted.
- USERPREFS/autoupdater/PackageName/downloads All newer release files for a package are first downloaded to this folder. If all the files are successfully downloaded AutoUpdater moves the files from the downloads folder to the respective targetfilepath locations.
- USERPREFS/autoupdater/logs This folder contains the AutoUpdater log files.
- USERPREFS/autoupdater/logs/AppName_log.txt AppName is replaced with the actual AutoUpdater application name. One log file is created for each application. The file contains any errors that were logged by AutoUpdater for the application.
Update Self
If you need to update your runtime users with a newer version of your AutoUpdater library you can do so as follows:
- Open the AutoUpdater library with a developer version of Omnis Studio.
- Open the settings window from the menu.
- Select the tab > sub-tab.
- Click the button.
The first time you do this it creates a new package on your files server specifically for your AutoUpdater library. The package file lists a single file, your AutoUpdater library, with the file path set as APP/YourAutoUpdaterFileName. It then uploads your AutoUpdater library to the files server. (The Windows platform won't let you copy a file that is open, so for Windows a new library is created and all the classes are copied to the new library, the copy library is closed and then uploaded to the files server.)
The next time you click the button it will only upload the AutoUpdater library since the package already exists.
When a runtime user asks to update their application the AutoUpdater library will do the following:
- Checks to see if there is a newer version of your AutoUpdater library that needs to be downloaded.
- The newer version is downloaded from the file server to the downloads folder.
- A special LibraryOps_AutoUpdater.lbs file is created by the older version library in the OMNIS/autoupdater folder.
- The special library is opened and then sent a message to close and delete the old library and then copy the new library to the old library's location.
The code to replace the old library took me a full day to figure out because the Windows platform doesn't let you do anything to a file that is open, and Omnis Studio bails out if you close a library which is executing a method. Creating the special library and using a timer object was the eventual solution.
- The new AutoUpdater library is opened. If set to check on startup it will look for newer version packages and files and download them as normal.
Limitations
There are some AutoUpdater limitations you should be aware of:
- The target file names must be unique within each package. You can not have the same file name in two different target folders within the same package.
- The target file name can not have a triple underscore ___ in the file name. The triple underscore is reserved by AutoUpdater for separating the release date string in the server file name.
- For Mac OS 9 compatability the maximum file length name is 31 characters including the extension.
- Not all databases are supported. AutoUpdater has been designed so that other RDBMSs can be easily be added, it just needs someone to modify and test AutoUpdater with another database vendor. Email me if you need help with doing this.
Future Enhancements
The following is a list of enhancements on the wish list for AutoUpdater.
- Platform specific updates - The ability to specify different files for different platforms. (e.g. MacOSX, Windows, MacOSX_intel, MacOSX_ppc, Windows_xp, Windows_vista)
- Add the AutoUpdater classes to the main library and run AutoUpdater from the main library, negating the need for a separate AutoUpdater library.
Known Bugs
The following are known bugs with AutoUpdater.
- Update Self - 2007-10-22 Doug K - Copying the AutoUpdater library to a MySQL database is not working. The files size binary is way too small. Haven't had time to debug this yet.
Bugs and Enhancements
This section lists any known AutoUpdater bugs and requested enhancements.
Each bug or enhancement is listed with the date and the notifier/requester.Bugs
The following are known bugs with AutoUpdater.
- Update Self - 2007-10-22 Doug K - Copying the AutoUpdater library to a MySQL database is not working. The files size binary is way too small. Haven't had time to debug this yet.
Enhancements
The following is a list of enhancements requests for AutoUpdater.
- Platform specific updates - The ability to specify different files for different platforms. (e.g. MacOSX, Windows, MacOSX_intel, MacOSX_ppc, Windows_xp, Windows_vista)
- Add the AutoUpdater classes to the main library and run AutoUpdater from the main library, negating the need for a separate AutoUpdater library.
Version 2007-10-30
The following is a summary of the changes included in this release.
- Quickstart Tutorial - Added an simple tutorial to make it easier to learn and setup AutoUpdater with your application.
- Create Package - Added a new window to make it much easier to create and upload a new package with the package's files to the files server.
- Edit Package - Added new window to make it easier to edit existing packages and upload them.
- MySQL - Added support for using MySQL as the files server. Introduced a structure for subclassing oLogon making it easier to implement additonal DAMs.
- PostgreSQL - Added support for using PostgreSQL as the files server. Live testing still needs to be done.
- AutoUpdater Paths - Added OMNISSTARTUP and USERPREFS to the possible folders where application files can be stored.
- oAutoUpdater Object - Figured out a generic way for the oAutoUpdater object to find the AutoUpdater task thereby allowing the object to be copied to the application's main library without modification. Added an mAutoUpdater menu which can be simply be added as a cascading menu to an existing application's main menu with code changes.
Details
Startup_Task/$isAutoUpdaterTask (2007-10-23 Doug K.)
Added $isAutoUpdaterTask method to the Startup_Task so that the oAutoUpdater object can automatically find the AutoUpdater task by sending an $isAutoUpdater.$cando message to each $itask till it finds one.
Startup_Task/$promptonceLastError (2007-10-23 Doug K.)
Added $promptonceLastError method so that the main library can ask the AutoUpdater task to report the last error.
Startup_Task/$runDemo (2007-10-23 Doug K.)
Added method to the Startup_Task for AutoUpdater documentation (uses StudioTips)
Startup_Task/$updateAutoUpdaterMenuLine (2007-10-11 Doug K.)
Added method to be allow the AutoUpdater menu line text to be updated on-the-fly.
mAutoUpdaterDeveloperMultiApp/$updateMenuLineText (2007-10-12 Doug K.)
Added method to allow AutoUpdater to change the menu line text.
oAutoUpdater/$#About (2007-10-23 Doug K.)
Modified the oAutoUpdater object so it can find the AutoUpdater task on its own using $isAutoUpdaterTask.
oAutoUpdater/$#About (2007-10-23 Doug K.)
Modified the oAutoUpdater object so it is a 'visual' object which immediately notifies the user of any errors detected.
oErrorHandler/retFTPErrorText (2007-09-26 Doug K.)
Added method to return the specified FTP error code text for the $logFTPError method.
oFilesServer_DB/_createTable_serverfile (2007-10-24 Doug K.)
Add exception for MYSQLDAM to create the table using MEDIUMBLOB rather than BLOB for the filebinary datatype.
oFilesServer_DB/_createTable_serverpackage (2007-10-24 Doug K.)
Add exception for MYSQLDAM to create the table using MEDIUMBLOB rather than BLOB for the filebinary datatype.
oFilesServer_DB/_createTable_serverpackage (2007-10-24 Doug K.)
Add unique constraint on packagefilename.
oFilesServer_FTP/$deleteServerFiles (2007-10-12 Doug K.)
Fixed the method so that is deletes FTP server files.
oFilesServer_FTP/$downloadServerFiles (2007-10-11 Doug K.)
Bug fix. The PkgName was not being set the first time through the loop and therefore the working directory was not being set.
oFunctions/$retContainedObjs (2007-03-07 Doug K.)
Added objdataname to the objects list.
oFunctions/$retEnclosedFilesList (2007-10-11 Doug K.)
Added FileOps Tool method.
oFunctions/$retExportFormatsList (2007-10-11 Doug K.)
Added FileOps Tool method.
oFunctions/$retFileOpsErrortext (2007-10-11 Doug K.)
Added FileOps Tool method.
oFunctions/retEnclosedFilesList (2007-10-11 Doug K.)
Added FileOps Tool method.
oLibraryOps_CreateLibrary/checkaddupdateLibraryOpsFile (2007-10-24 Doug K.)
Copy the $classdata twice. Save the class each time.
oLibraryOps_CreateLibrary/checkaddupdateLibraryOpsFile (2007-10-24 Doug K.)
If the LibraryOps library is already open, close it, so that it can be recreated is the file was tossed in the trash.
oLogon/$logon (2007-10-24 Doug K.)
Bug fix. Combine the hostname/databasename for FrontBase.
oLogon_MYSQL/$logon (2007-10-13 Doug K.)
Override the $logon method in for MySQL because the $databasename property must be set.
oLogon_MYSQL/$pingDatabase (2007-10-13 Doug K.)
Override the $pingDatabase method in for MySQL and modify to suit.
oLogon_PGSQL/$logon (2007-10-13 Doug K.)
Override the $logon method in for MySQL because the $databasename property must be set.
oLogon_PGSQL/$pingDatabase (2007-10-13 Doug K.)
Override the $pingDatabase method in for MySQL and modify to suit.
oPaths/retProgramFiles_unix (2007-03-06 Doug K. per Matthias Henze)
User getenv() function to calculate the home folder path on Unix platform.
oPaths/retTempFiles_unix (2007-03-06 Doug K. per Matthias Henze)
User getenv() function to calculate the home folder path on Unix platform.
oPaths/trimPath (2007-07-05 Doug K.)
Added new method which trims double quotes off file paths (from Applescript) and trims trailing path delimiters.
oPreferences/$:ServerInfo (2007-10-11 Doug K.)
Changed calculation of FTP server infor to use $:FTPServerAddress rather than $:ServerAddress
oStartupTaskDefaultMethods/$updateAutoUpdaterMenuLine (2007-10-11 Doug K.)
Added method to allow the AutoUpdater menu line to be updated on-the-fly.
oStartupTaskDefaultMethods/$updateNow (2006-07-05 Doug K.)
Set download files list to smartlist and filter out the 'delete' files before deciding whether or not to prompt for updates.
oUpdater/$uploadSelf (2006-07-05 Doug K.)
Added parameter pReleaseNum_opt so that sender can specify the version number for the current date. Previously the version number was the current hour only.
oUpdaterTools/$checkSourceFileName (2007-10-12 Doug K.)
Added method to check the file name for unwanted characters.
oUpdaterTools/$convertSourceFilePathToTargetFilePath (2007-10-12 Doug K.)
Added method to check and convert a sourcefilepath to a targetfilepath.
oUpdaterTools/$convertTargetFilePathToLocalFilePath (2007-10-12 Doug K.)
Added OMNISSTARTUP and USERPREFS to the possible targetfilepath prefixes handled by this method.
wPackageEditor/checkPackageFilesList (2007-10-13 Doug K.)
Added OMNISTARTUP and USERPREFS to the possible prefixes.
wPreferencesDeveloper/$event (2006-07-05 Doug K.)
Added the release number as a parameter sent to oUpdater.$uploadSelf.
wPromptForUpdates/$setDownloadFilesList (2006-07-05 Doug K.)
Set download files list to smartlist and filter out the 'delete' files before displaying the list.
wPromptForUpdates/installUpdates (2006-06-05 Doug K.)
Comment out the OK message which informs the user that the new software has been successfully downloaded and installed. The messages gets annoying and it halts completion of the download, install, and restart.
wPromptForUpdates/installUpdates (2006-07-05 Doug K.)
Unfilter the download files smartlist before sending the list to oUpdater.$downloadandinstallFiles.
wServerFiles/$#About (2007-10-11 Doug K.)
Added radio buttons for 'Show All' and 'Show' Lastest files.
wServerFiles/downloadSelectedFiles (2007-10-11 Doug K.)
The prompt title was not being calculated correctly.
Update the packages list each time the window comes to the front.